Last Updated on March 25, 2024
Article Contents

Ever wished you could explain your complex ideas in a simple, engaging way? Explainer videos are your answer! These short, animated clips are powerful tools for communicating complex concepts, showcasing products or services, and captivating audiences. Whether you’re a business owner, entrepreneur, or simply someone with a message to share, learning how to make an explainer video can be incredibly valuable.
But where do you begin? Don’t worry, we’ve got you covered! This step-by-step guide will equip you with the knowledge and tools to create your first explainer video, even if you’re a complete beginner.
Why Use Explainer Videos?
Before we dive into the how-to, let’s explore the why:
- Boost engagement and understanding: Explainer videos are processed faster than text, making them ideal for capturing attention and ensuring your message resonates.
- Simplify complex topics: Break down intricate concepts into bite-sized visuals and narratives, making them easier to grasp for viewers.
- Increase conversions and sales: Explain the value of your product or service in a clear, concise way, driving viewers towards desired actions.
- Build brand awareness: Inject personality and style into your explainer video, leaving a lasting impression on your audience.
Ready to unlock the power of explainer videos? Let’s get started!
In the next section, we’ll delve into the crucial first steps of how to make an explainer video: defining your target audience and identifying the key message you want to convey.
Planning Your Explainer Video
Solid planning is the foundation for a successful explainer video. Before diving into animation or visuals, take some time to define your target audience and goals, craft a compelling script, and outline key messages and visuals.
Define your target audience and goals
Who wants a run-of-the-mill explainer video when you can craft one that elevates your brand and captivate your audience? But before diving into animation and voiceovers, consider these crucial steps:
Know Your Audience: Understanding your target audience is the foundation for a tailored and impactful video. Are you reaching tech-savvy Gen Z, industry professionals, or a broader audience with varied knowledge? Identifying their needs, interests, and pain points helps you speak directly to them, resonating on a deeper level.
Define Your Goals: What do you want viewers to do after watching? Should they visit your website, download your app, sign up for a service, or simply gain a striking understanding of your product? Having a clear goal guides every aspect of your video, ensuring it drives action and achieves your desired outcome.
Craft a compelling script
Your script is the backbone of your explainer video. It should be concise, engaging, and free of jargon. Focus on storytelling, using clear language and relatable examples to illustrate your points. Think of it as a mini-movie script, with a beginning, middle, and end that keeps viewers hooked.
Here are some scriptwriting tips:
- Start with a strong hook: Grab attention within the first few seconds by highlighting a problem your audience faces or posing a question.
- Maintain a conversational tone: Avoid sounding overly salesy or technical. Speak directly to your audience and use language they can understand.
- Focus on benefits, not features: Explain how your product or service solves problems and improves lives, not just its technical specifications.
- End with a call to action: Tell viewers what you want them to do next, whether it’s visiting your website, subscribing to your channel, or contacting you for more information.
Outline key messages and visuals
Once you have your script, it’s time to map out the key messages and visuals that will support them. This will help you visualize the flow of your video and ensure it stays on track.
- Identify key messages: What are the 2-3 most important things you want viewers to remember?
- Plan visuals for each message: What images, animations, or video clips will effectively convey each point?
- Consider the emotional tone: Do you want your video to be informative, humorous, or inspiring? Choose visuals that match the desired tone.
- Storyboard your video: This is optional, but it can be a helpful way to visualize the flow of your video and ensure it’s visually engaging.
Planning is crucial for creating an explainer video that resonates with your audience and achieves your goals. Take the time to define your target audience, craft a compelling script, and outline your key messages and visuals before moving on to production.
Choosing the Right Tools and Software
Now that you’ve carefully mapped out your explainer video’s foundation, it’s time to find the tools to bring your vision to life! But with countless explainer video making software and services options available, navigating this landscape can feel overwhelming. Don’t worry, we’ve got you covered!
Conduct thorough research on explainer video-making services and software
Before diving in, conduct thorough research on the available options. Don’t limit yourself! Explore a variety of explainer video-making services and software, including popular choices like Animaker, Powtoon, Vyond, and Synthesia. Each platform offers unique strengths and caters to different needs.
Here are some key steps in your research:
- Define your needs and budget: What type of explainer video are you creating? What features are essential? How much does it cost to make an explainer video?
- Explore beyond the obvious: Look beyond just the first few options. Consider both software and explainer video services that offer custom creation based on your script and ideas.
- Leverage online resources: Utilize online directories, review platforms, and comparison articles and guides to gain insights from users and experts.
Ready to take your explainer video to the next level? Consider exploring custom explainer video services like Mypromovideos. Our experienced team can work with your script and ideas to create a unique and engaging video that stands out from the crowd. Contact us today for a free consultation and see how we can help you bring your vision to life!
Review of free and paid options
Now that you’ve explored the explainer video making software landscape, let’s delve into the two main categories: free and paid options. Each has its own set of advantages and drawbacks, so choosing the right one depends on your specific needs and budget.
Free Explainer Video Tools:
- Pros:
- Ideal for beginners or budget-conscious creators.
- Offer basic features and templates to get you started.
- Perfect for experimenting and learning the ropes.
- Cons:
- Limited customization options, watermarks, or shorter export durations.
- May lack advanced features like screen recording or high-quality exports.
- Might not be suitable for professional or complex video projects.
Popular Free Options:
- DaVinci Resolve (advanced editing software with limited animation features)
- HitFilm Express (powerful editing software with some animation tools)
- Blender (open-source 3D animation software with a learning curve)
- Powtoon Free Plan (limited templates and features)
- Animaker Free Plan (limited exports and features)
Paid Explainer Video Software:
- Pros:
- Wide range of features and functionalities.
- Extensive libraries of assets like characters, animations, and music.
- High-quality exports for professional use.
- Additional support services like tutorials and customer support.
- Cons:
- Can be more expensive, requiring monthly or yearly subscriptions.
- May have a steeper learning curve compared to free options.
Popular Paid Options:
- Vyond (wide range of features, ideal for whiteboard and animated explainers)
- Animaker (user-centric platform with animation, live-action, and whiteboard styles)
- Powtoon (great for quick and easy animated explainers)
- Synthesia (AI-powered video creation with realistic avatars)
- Adobe After Effects (industry-standard animation software with a high learning curve)
For an in-depth analysis of different paid explainer video software and features, check out our comprehensive guide: “Best Explainer Video Maker”.
Ultimately, the best choice between free and paid options depends on your specific needs. If you’re just starting out or have a limited budget, free tools can be a great way to get your feet wet. However, if you need professional-quality results, advanced features, and ongoing support, then investing in paid software might be the better choice.
Remember: Consider your goals, budget, and skill level when making your decision. Don’t be afraid to try out free demos or trials of paid options before committing to ensure they meet your needs.
Compare the features and functionalities
Once you’ve shortlisted a few potential tools, it’s time to compare their features and functionalities in detail. Here are some key aspects to consider:
- Animation styles: Does the software offer the type of animation you envision (e.g., 2D, 3D, whiteboard)?
- Ease of use: Is the interface intuitive and user-friendly, even for beginners?
- Customization options: Can you personalize your video with custom characters, fonts, and colors?
- Music and sound effects libraries: Does the software provide a diverse selection of audio elements?
- Export options: Can you export your video in various formats and resolutions for different platforms?
- Additional features: Does the software offer advanced features like screen recording, live-action integration, or interactive elements?
By carefully comparing these aspects across your shortlisted options, you’ll be well-equipped to select the best explainer video maker that perfectly aligns with your needs and vision.
Here’s how to make an animated explainer video in 5 easy steps:
Ready to bring your explainer video vision to life with animation? This 5-step guide will help you navigate the process from concept to completion, ensuring your video resonates with your audience and achieves its goals.
Step1: Choose a Video Style
Animation comes in a dazzling spectrum of styles, each with its own unique personality and ability to connect with viewers. Before diving in, choose the style that best aligns with your brand identity and message.
Popular Styles:
- 2D Animation: Classic and versatile, offering flexibility in character design and storytelling.
- Motion Graphics: Sleek and modern, ideal for data visualization or complex concepts.
- Whiteboard Animation: Simple and engaging, perfect for explaining processes or technical topics.
- Stop-Motion Animation: Tactile and charming, ideal for adding a handcrafted feel.
- 3D Animation: Immersive and visually stunning, excellent for showcasing products or services.
Remember:
- Brand Alignment: Choose a style that reflects your brand’s personality and values.
- Target Audience: Consider who you’re trying to reach and what style resonates with them.
- Project Goals: Ensure the chosen style effectively communicates your message.
Step 2: Create a Storyboard
A storyboard is your explainer video’s blueprint, visualizing each scene and ensuring a clear flow. Don’t underestimate its power!
Storyboarding Tips:
- Sketch it out: Even rough sketches can effectively convey your vision.
- Focus on key moments: Capture the essential scenes and transitions.
- Keep it concise: Aim for 1-2 panels per scene, avoiding information overload.
- Consider the flow: Ensure a logical and engaging progression of ideas.
Step 3: Record and Edit Voiceovers and Narrations
The voiceover is your explainer video’s narrator, guiding viewers through your story. Make it count!
Voiceover Options:
- Do-It-Yourself: If you have a confident voice and good recording equipment, this can be a budget-friendly option.
- Hire a Professional: Consider professional voiceover artists for polished delivery and matching your brand tone.
- Text-to-Speech Software: Emerging technologies offer synthetic voices, though quality and expressiveness may vary.
Voiceover Tips:
- Clear and Enunciated: Ensure your voice is easy to understand.
- Engaging and Expressive: Infuse your voice with emotion and personality.
- Match the Video Pace: Align your voiceover timing with the visuals.
Step 4: Collect Animation and Visual Elements
High-quality visuals bring your explainer video to life. Choose graphics and animations that complement your story and brand identity.
Visual Consistency:
- Maintain a cohesive style: Use fonts, colors, and character designs consistently throughout the video.
- High-Resolution Assets: Ensure graphics and animations are crisp and professional-looking.
- Complementary Music: Choose background music that enhances the mood and tone of your video.
Step 5: Editing and Finalize
Now comes the final step: bringing everything together and refining your masterpiece.
Editing Magic:
- Combine elements: Seamlessly integrate your voiceover, visuals, and animations.
- Fine-tune transitions: Ensure smooth and natural transitions between scenes.
- Timing is Key: Adjust pacing and timing for optimal impact.
Don’t forget:
- Proofread and Revise: Review your video for any errors or inconsistencies.
- Get Feedback: Share your video with trusted individuals for constructive feedback.
- Export and Share: Choose the appropriate format and platform to share your video with the world.
By following these 5 steps and focusing on clarity, consistency, and quality, you’ll be well on your way to creating an animated explainer video that engages your audience and achieves your explainer video marketing goals. Remember, the journey of animation is a creative adventure, so have fun and experiment!
How to Make an Explainer Video for Free?
Crafting an explainer video on a budget is possible! While limitations exist, numerous free tools empower you to tell your story and engage your audience. Let’s delve into 5 fantastic tools on how to make an explainer video for free to kickstart your video creation:
1. DaVinci Resolve:
- Strength: Packed with industry-standard editing features, color correction, and visual effects.
- Limitations: Steeper learning curve, primarily focused on editing, not specifically designed for animation.
- Ideal for: Tech-savvy users comfortable with complex software, seeking advanced editing and customization.
2. HitFilm Express:
- Strength: Offers basic animation tools, compositing, and special effects alongside editing capabilities.
- Limitations: Limited animation styles and assets, might require additional learning for advanced functionalities.
- Ideal for: Users comfortable with video editing software, wanting to experiment with basic animation and visual effects.
3. Blender:
- Strength: Powerful 3D animation software with a vast community and resources, endless creative potential.
- Limitations: Extremely steep learning curve, requires significant time and dedication to master.
- Ideal for: Dedicated individuals passionate about 3D animation, comfortable with complex software and a long learning journey.
4. Powtoon Free Plan:
- Strength: User-friendly interface, drag-and-drop functionality, pre-made templates, basic animation features.
- Limitations: Limited customization options, watermarks on exported videos, restricted asset library.
- Ideal for: Beginners wanting to create simple explainer videos quickly, comfortable with pre-made templates and limited customization.
5. Animaker Free Plan:
- Strength: Offers 2D animation, whiteboard, live-action, and text-based explainer video styles, freemium model allows limited exports.
- Limitations: Watermarks on exported videos, shorter export durations, limited character and animation options in the free plan.
- Ideal for: Users wanting to explore different explainer video styles, comfortable with limitations and watermarks in the free version.
Potential Limitations and Overcoming Them
While these free tools open doors to creativity, they may have limitations in terms of advanced features, watermarks on videos, or restrictions on export quality. To overcome these limitations:
Consider Professional Guidance:
- While free tools are fantastic for DIY projects, professional guidance can elevate your video to the next level. Experts bring in-depth knowledge of storytelling, animation, and industry standards.
Invest in Premium Versions:
- Upgrade to premium versions of free tools or explore affordable paid alternatives. This unlocks advanced features, higher export quality, and removes watermarks, providing a more polished final product.
Ready to Take Your Explainer Video to the Next Level?
While free tools offer a great starting point, envision the unparalleled impact of a professionally crafted explainer video. Consider the benefits of expert guidance and unlock the full potential of your brand’s narrative.
Elevate your message with our expertise – Where Your Vision Meets Professional Excellence.
Have you considered hiring a professional agency?
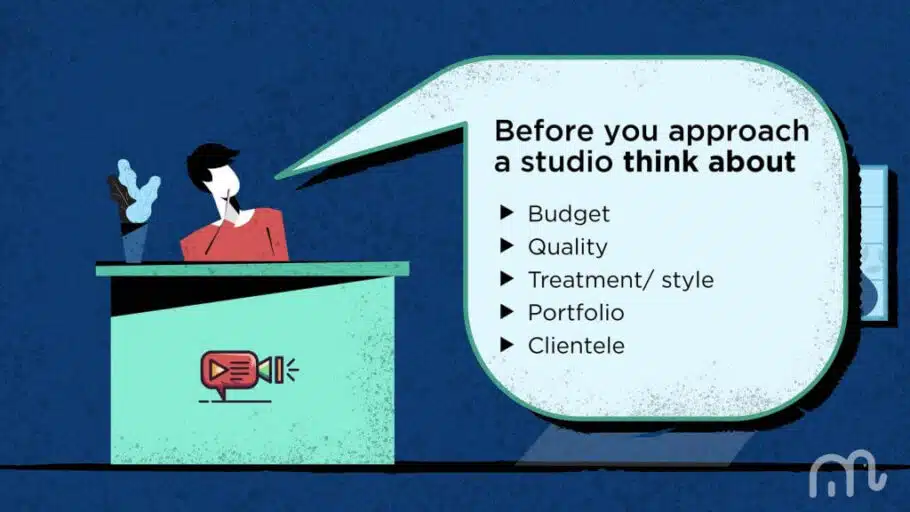
Creating an explainer video can be an exciting and rewarding experience, but it’s also a significant investment of time, energy, and resources. While free tools offer a starting point, partnering with a professional explainer video company can unlock several advantages:
Money matters
Free tools: While tempting, remember the hidden costs of your time and effort invested in learning, troubleshooting, and creating a polished video.
Professional agency: While an initial investment, professional agencies offer efficient production, expertise, and a high-quality final product, potentially saving you time and money in the long run.
Consider:
- Value of your time: How much is your time worth compared to the agency’s expertise?
- Hidden costs of free tools: Consider time spent learning, troubleshooting, and limited customization.
- Return on investment: A professional video can generate leads, sales, and brand awareness, potentially outweighing the initial cost.
Expected quality
Free tools: While offering basic features, they may limit your ability to achieve a professional look and feel.
Professional agency: Agencies have access to high-quality assets, animation styles, voiceovers, and editing expertise, resulting in a polished and impactful video.
Consider:
- Brand image: Does your brand require a professional and polished video for credibility?
- Target audience: Will a high-quality video resonate better with your target audience?
- Complexity of your vision: Can you achieve the desired style and features with free tools?
Treatment of your choice
Free tools: You have complete creative control, but might lack guidance and expertise.
Professional agency: Agencies offer collaborative processes, incorporating your ideas while providing expert suggestions and feedback.
Consider:
- Comfort level with creative control: Are you confident in your creative vision and execution?
- Openness to expert feedback: Do you value professional insights to enhance your video?
- Time constraints: Do you have the time and resources to manage the entire creative process?
Portfolio of the studio
Free tools: Limited resources may restrict your creative vision.
Professional agency: Agencies showcase their portfolio, demonstrating their expertise in various styles, industries, and creative approaches.
Consider:
- Alignment with your style: Does the agency’s portfolio reflect your desired video style and tone?
- Industry experience: Do they have experience creating videos for your specific industry or target audience?
- Proven results: Can they showcase successful client projects with measurable outcomes?
Previous clients of the studio
Free tools: You navigate the process alone.
Professional agency: Client testimonials and case studies offer valuable insights into the agency’s experience and impact.
Consider:
- Client satisfaction: What do past clients say about the agency’s communication, process, and final product?
- Industry relevance: Are there testimonials from clients in your industry or with similar video needs?
- Trust and confidence: Do the testimonials inspire trust and confidence in the agency’s capabilities?
Choosing a professional explainer video agency is an investment in your brand and communication strategy. Carefully evaluating these factors will help you make an informed decision and partner with an agency that aligns with your budget, quality expectations, and creative vision.