

Last Updated on June 24, 2026
Contents
Estimated reading time: 11 minutes
There are 6 core types of video editing: linear, non-linear (NLE), online, offline, live, and bespoke. These describe how footage is assembled. Within them, editors apply specific techniques: cuts (standard, jump, cross, match, J/L-cut), transitions (fade, dissolve, wipe, zoom), and advanced methods (montage, split-screen, color grading, motion graphics). This guide breaks down each type, the technique behind it, and the software it is done in, so you can tell which approach fits your project.
Most professional work today is non-linear editing done in tools like Adobe Premiere Pro, DaVinci Resolve, or Final Cut Pro. But “type of editing” can mean three different things: the workflow (how footage is handled), the cuts and transitions (how shots connect), and the advanced techniques that shape the final look. Here is all three, starting with the six workflow types.
Types of video editing by workflow
The six main types of video editing describe how footage is captured, assembled, and finished. Most modern projects use non-linear editing, but the right workflow depends on the size of the project, whether it is live, and how it needs to be finished.
| Type | Category | What it is | Common software | Best for |
|---|---|---|---|---|
| Non-Linear (NLE) | Workflow | Edit clips in any order, non-destructively | Premiere Pro, DaVinci Resolve, Final Cut Pro | Most modern editing |
| Linear | Workflow | Edits made in sequence on tape; cannot reorder | Legacy tape decks | Legacy broadcast |
| Offline | Workflow | Edit low-res proxies first, then conform | Premiere Pro, Avid Media Composer | Large / high-res projects |
| Online | Workflow | Final high-res conform, color and audio finishing | DaVinci Resolve, Avid | Finishing / mastering |
| Live | Workflow | Real-time switching between camera feeds | vMix, Blackmagic ATEM | Events, broadcasts, streams |
| Bespoke / creative | Purpose | Custom narrative or brand-driven edit | After Effects + an NLE | Brand films, ads, explainers |
Non-Linear Editing (NLE)
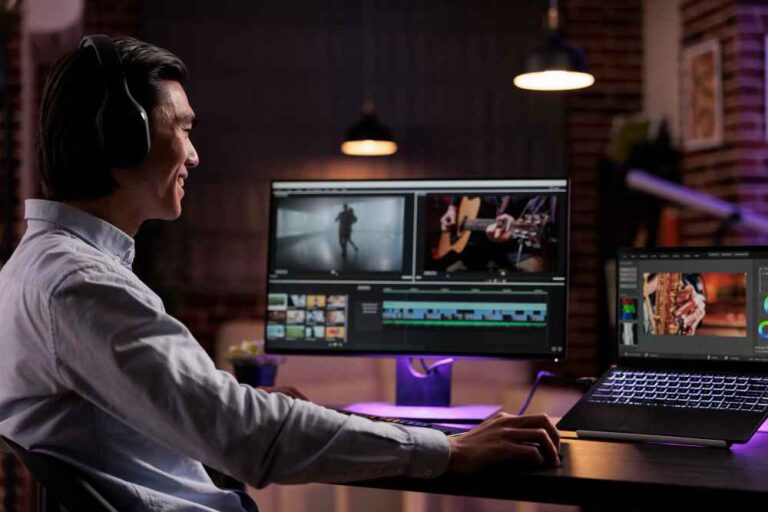
Non-Linear Editing (NLE) revolutionized video production with its flexibility and efficiency. This digital editing method allows editors to access any frame in a video clip regardless of the sequence, making it easy to rearrange and modify segments without altering the original footage. NLE provides enhanced creative control, facilitating complex edits, effects, and transitions effortlessly. Popular NLE software includes Adobe Premiere Pro, DaVinci Resolve, Final Cut Pro, and Avid Media Composer, all of which offer a range of tools to optimize the editing workflow. Almost everything produced today is edited this way.
Industries we serve
Linear Editing
Linear editing is a traditional video editing method that involves selecting and arranging video clips in a sequential order, typically on a videotape. This technique requires the editor to work in a step-by-step manner, making edits in the order they appear from start to finish. Once a change is made, going back and modifying earlier parts can be time-consuming. Largely obsolete and replaced by NLE, linear editing is still valued for its simplicity and the discipline it instills in planning each edit carefully.
Offline Editing
Offline editing is the preliminary phase in video post-production, where editors work with lower resolution proxy copies of the original footage to create a rough cut. This method conserves computing resources and expedites the editing process, which keeps things fast on big or high-res (4K/8K) shoots. Once the rough cut is finalized, it is then conformed to the high-resolution footage during the online editing stage. Editors typically work in Adobe Premiere Pro or Avid Media Composer during this stage, experimenting and refining their edits without worrying about technical constraints.
Online Editing
Online editing is the final stage of video post-production, where the edited sequence is fine-tuned and polished for distribution. This process involves color correction, sound mixing, and adding visual effects to ensure the highest quality output. Unlike offline editing, online editing works with the highest resolution footage to maintain the integrity and clarity of the final product. Most finishing work is done in DaVinci Resolve, renowned for its color tools, or Avid. By perfecting the technical details, online editing ensures that the video meets industry standards and looks impeccable on all viewing platforms.
Live Editing
Live editing involves making real-time edits during an event or broadcast, allowing for immediate adjustments and seamless integration of various media elements. This technique is often used in live sports, news broadcasts, conferences, and concerts, where the editing team needs to switch between camera angles, insert graphics, and manage audio levels on the fly. Live switching is powered by hardware and software such as Blackmagic ATEM or vMix. Efficiency and quick decision-making are crucial in live editing to ensure a flawless and engaging viewer experience, and the ability to adapt swiftly to changing scenarios makes it a dynamic and challenging aspect of video production.
Bespoke / Creative Editing
Bespoke editing involves tailoring the editing process to meet the specific needs and preferences of the client or project. This purpose-driven approach allows for a more personalized touch, ensuring that the final video aligns perfectly with the vision and objectives of the stakeholders. It often blends an NLE with motion graphics built in Adobe After Effects, along with unique transitions, custom graphics, and special effects crafted specifically for the project. By focusing on individual requirements, bespoke editing creates a distinctive and memorable video that stands out, which is exactly the approach behind professional explainer video production and corporate video work.
Essential types of cuts in video editing
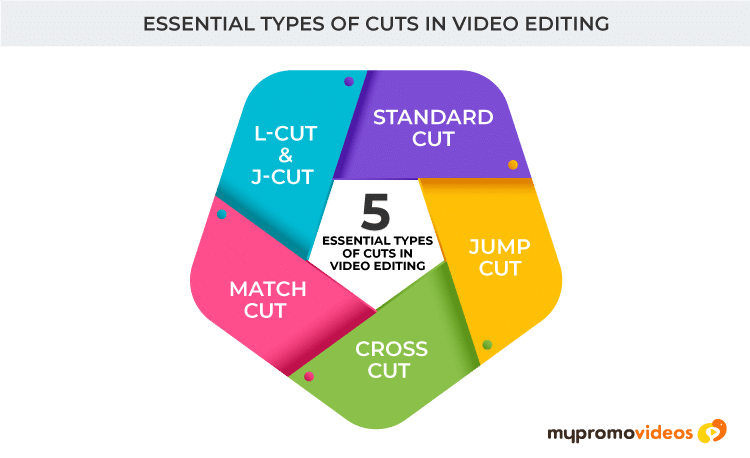
A cut is the most basic edit, the instant switch from one shot to the next, and the cut you choose controls pacing, emotion, and how scenes connect. Understanding the essential types of cuts in video editing is fundamental for any editor aiming to create a cohesive and engaging narrative, allowing for a seamless storytelling experience.
| Cut | What it does | Typical use |
|---|---|---|
| Standard cut | Instant switch between two shots | Everyday continuity editing |
| Jump cut | Skips forward within the same shot | Fast pacing, vlogs, time compression |
| Cross-cut (parallel) | Alternates between two simultaneous scenes | Building tension, two storylines |
| Match cut | Links two shots by shared shape, motion, or subject | Smooth, creative transitions |
| J-cut / L-cut | Audio leads (J) or lingers (L) across the cut | Natural dialogue and interview flow |
Standard Cut
The standard cut is the most basic and commonly used type of cut in video editing. It involves a straightforward transition from one clip to the next, without any special effects or transitions. This cut is ideal for maintaining the narrative flow and ensuring a seamless progression of scenes. By simply cutting from one shot to another, the standard cut keeps the audience’s attention on the story, making it the invisible workhorse of any editor’s toolkit.
Jump Cut
A jump cut is a type of edit that involves an abrupt transition between two sequential shots that vary only slightly in angle or composition. This technique creates a jarring effect, drawing attention to the passage of time or emphasizing a particular segment of action. Jump cuts are often used in vlogs, interviews, or to add a dynamic flair to fast-paced sequences. While they can disrupt the smooth flow of a narrative, when used intentionally, jump cuts can effectively highlight changes, speed up the story, or convey a sense of urgency.
Cross Cut (Parallel Editing)
Cross-cutting, also known as parallel editing, is a technique used to depict two or more actions happening simultaneously in different locations. By alternating between the scenes, this method builds suspense and draws connections between the narratives occurring at the same time. Cross-cutting keeps the audience engaged by creating a sense of urgency and can enhance the storytelling by highlighting contrasts or similarities between the concurrent events.
Match Cut
A match cut is an editing technique where two visually similar shots are juxtaposed, creating a seamless transition that links two different scenes or actions. This can be achieved through matching shapes, colors, or thematic elements. Match cuts maintain the aesthetic continuity and can serve to indicate a connection or smooth out a potentially jarring scene transition. This method not only enhances the visual flow but also aids in storytelling by subtly guiding the audience’s attention.
L-Cut and J-Cut
L-Cuts and J-Cuts are techniques that play with the audio-visual elements to create a natural flow between scenes. An L-Cut occurs when the audio from the current scene continues to play over the beginning of the next scene, thus extending the audio “tail” into the new visual. Conversely, a J-Cut starts the audio from the upcoming scene while the visual from the current scene is still being shown, leading the audio “head” into the existing shot. These methods help bridge scenes smoothly, facilitating transitions and maintaining storytelling rhythm in dialogue and interviews.
Common transitions in video editing
A transition bridges two shots more gradually than a cut. Used sparingly, transitions signal a change in time, place, or mood and can add a polished, professional touch. Below are the transitions most commonly used in video editing and their distinctive effects.
| Transition | Effect | Best for |
|---|---|---|
| Fade in / out | Shot appears from, or dissolves to, black | Opening or closing a video or section |
| Dissolve (crossfade) | One shot blends into the next | Passing of time, soft mood |
| Wipe | One shot pushes another off-screen | Stylized, energetic changes |
| Zoom / push | Camera zooms or slides between shots | Modern, dynamic social and ad edits |
Standard Transition
A standard transition in video editing is the typical cut where one shot directly follows another without any added effect. This method maintains continuity, ensuring that the narrative progresses naturally and fluidly from one scene to the next. It is the most basic yet effective form of transition, often used to maintain a straightforward flow in storytelling. The simplicity of standard transitions ensures they do not distract the audience, keeping the focus on the content itself.
Fade In / Fade Out
Fade In and Fade Out transitions are used to gradually ease the viewer into or out of a scene. A Fade In transition slowly brings the image from black (or another color) to full visibility, often used at the beginning of a video or segment. Conversely, a Fade Out transition gradually diminishes the image into darkness, typically marking the end of a scene or piece of content. These techniques create a smooth and gentle visual experience, which can evoke emotion and signify the passage of time.
Dissolve (Crossfade)
A dissolve, also known as a crossfade, smoothens the transition between two scenes by overlapping the end of one shot with the beginning of the next. This creates a blending effect, where the first image gradually fades out as the second image simultaneously fades in. Dissolves are often used to signify a change in time or location, or to convey a connection between scenes. This technique provides a seamless and visually pleasing transition that helps maintain the narrative flow.
Wipe
A wipe transition involves one shot being progressively replaced by another shot in a distinct direction or shape, such as a vertical line or a clock hand. This technique visually “wipes” the first image off the screen, revealing the next scene beneath it. Wipes can be used to suggest a dynamic change in time or setting, or to introduce a new narrative thread. They are often employed in more stylized or genre-specific contexts to add a layer of visual interest and distinguish different sections of the story.
Zoom and Push Transitions
Zoom and push transitions involve changing the scale or position of the image to create movement between scenes. A zoom transition enlarges or reduces the size of the image, guiding the viewer’s focus and adding an element of dynamism. A push transition, on the other hand, physically shifts the image off the screen while bringing the next scene into view from the opposite direction. These techniques are effective for maintaining visual interest and emphasizing a shift in perspective or action within the narrative, and they are especially popular in modern social and ad edits.
Advanced video editing techniques
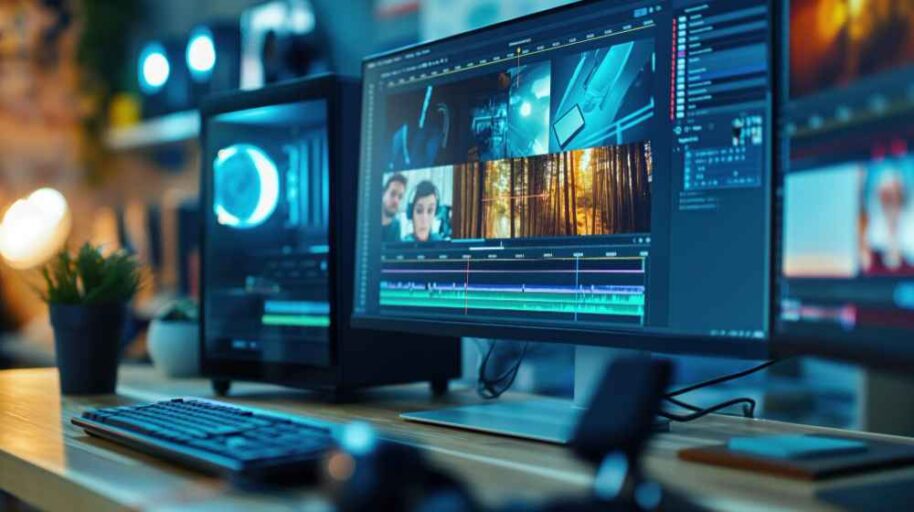
Advanced editing techniques enhance storytelling by introducing complex visual and auditory elements. They require a nuanced understanding of pacing, scene composition, and the thematic underpinnings of the narrative. Let’s explore some of these sophisticated methods that elevate cinematic and video production to an art form. The short showreel below shows many of these techniques, from cuts and transitions to motion graphics and color grading, working together in finished brand videos.
Montage Editing
Montage editing is a technique that involves piecing together a series of short, thematically related shots to convey a larger idea or passage of time, often set to music. By juxtaposing different clips in rapid succession, montages can evoke a wide range of emotions and illustrate complex concepts efficiently. This method is often used to show character development, compress lengthy sequences, or highlight parallel actions occurring simultaneously. Through creative editing, montages can transform simple scenes into powerful storytelling tools.
Split Screen Editing
Split screen editing involves dividing the screen into two or more sections, each displaying different footage simultaneously. This technique allows the viewer to observe multiple perspectives or events occurring at the same time, enhancing storytelling by showing parallel actions or contrasting scenes. Split screens are particularly effective in conveying conversations between characters in different locations or presenting a visual comparison. This editing style can add complexity and depth to the narrative, making it more engaging for the audience.
Color Grading and Correction
Color grading and correction are essential techniques in video editing that involve adjusting the color balance and enhancing the overall visual tone of the footage. Color correction ensures that the colors in different shots match, creating a consistent and natural look. Color grading, on the other hand, is used for artistic purposes, allowing editors to create a specific mood or atmosphere by altering the colors and contrasts. DaVinci Resolve is the industry standard for grading. These techniques work together to improve the visual appeal and cohesiveness of the final product, making the storytelling more compelling.
Motion Graphics and Animation
Motion graphics and animation involve creating and integrating animated visual elements into video projects. These techniques can be used to illustrate complex concepts, enhance storytelling, and add a dynamic flair to the footage. Motion graphics often include text, icons, charts, and logos that move in a seamless manner, created in Adobe After Effects, the industry-standard tool. Animation can range from simple 2D sequences to intricate 3D models. By incorporating motion graphics and animated video production, editors can engage viewers more effectively and convey information in a visually captivating way.
Which type of video editing (and software) should you use?
The right type of editing depends on what you are making and who is making it. Here is a quick guide to matching the workflow and software to your project.
- Marketing or brand video? Non-linear editing plus bespoke or creative editing and motion graphics, best handled by a pro team across explainer, corporate, and animated video production.
- Just starting out? Begin with DaVinci Resolve (free and professional) or CapCut and VN for quick social edits.
- Film or high-res project? Use an offline to online workflow in Premiere Pro or Avid, finishing in DaVinci Resolve.
- Live event? Use live switching with vMix or a Blackmagic ATEM.
- After Effects or Premiere Pro? Use Premiere to cut and assemble, and After Effects for motion graphics and effects. Most editors use both together.
Frequently asked questions
There are 6 core types of video editing: linear, non-linear (NLE), online, offline, live, and bespoke. Most modern editing is non-linear, done in software like Adobe Premiere Pro, DaVinci Resolve, or Final Cut Pro.
In editing-technique terms, the five most-used edits are the standard cut, jump cut, cross-cut (parallel), match cut, and the J-cut or L-cut. These control pacing and how scenes connect.
They do different jobs. Premiere Pro is for cutting and assembling footage into a finished video, while After Effects is for motion graphics, titles, and visual effects. Most editors use them together, not as alternatives.
Popular CapCut alternatives include DaVinci Resolve (free and professional-grade), Adobe Premiere Pro, Final Cut Pro, and VN. DaVinci Resolve is the most common free replacement for advanced editing.
Mastering the art of video editing
Mastering video editing means knowing not just the techniques like split screens, color grading, and motion graphics, but when to use each one to enhance both narrative and visual quality. Split screens create dynamic storytelling by showing multiple perspectives simultaneously, color grading adjusts the visual tone to evoke specific emotions, and motion graphics add an extra layer of engagement that makes content more visually appealing and professional. Just as important is continuous learning, since editors who stay current with evolving technologies and industry trends keep their work relevant, impactful, and competitive in a rapidly changing media landscape. These insights are invaluable for anyone seeking top-notch video production services.
Need professional video editing for your brand? MyPromoVideos produces explainer, corporate, and animated videos end to end, from script to final grade. Get in touch to talk through your project.
