Last Updated on August 28, 2024
Article Contents
Estimated reading time: 1 minute
How to Edit Videos on Laptops?
Video editing has become an essential skill in today’s digital age, allowing individuals and businesses to enhance their storytelling, create engaging content, and share their visions with a wider audience. Whether for personal projects, social media, or professional presentations, the ability to edit videos on laptops can significantly elevate the quality and impact of the final product. In this guide, we will explore two user-friendly tools that cater to different operating systems: the Windows Photos App, which offers basic editing features suitable for quick edits, and iMovie for Mac, a more robust application providing advanced editing capabilities that can help users create polished and visually appealing videos on their Laptops.
How to Edit Videos on a Laptop with the Photos App on Windows?

To begin editing your videos with the Photos App on Windows, follow these steps for a seamless experience:
- Opening and Initial Setup: Launch the Photos App by searching for it in the Windows Start Menu. Once opened, navigate to the “Video Editor” tab located at the top of the app. Click on “New Video Project” to start a new project, and give it a name to keep your work organized.
- Editing Features: Import your video footage by clicking on “Add” and selecting videos from your computer. With your video clips in place, you can drag and drop them into the storyboard. The Photos App provides a variety of basic editing tools, including trimming, splitting clips, adding text, and inserting music or sound effects to enhance your video.
- Advanced Editing: For those looking to go beyond the basics, the Photos App also offers features such as filters, motion effects, and transitions that can be applied to elevate the visual appeal of your project. Navigate through the toolbar to explore different options, allowing you to refine your video further.
- Exporting and Sharing Your Video: Once you are satisfied with your edits, it’s time to export your final product. Click on the “Finish Video” button and choose your desired video quality from options like “High” or “Medium.” After selecting the quality, click “Export” to save the video to your chosen folder. You can now share your creation directly from the app to social media platforms or via email, making it easy to showcase your work to others.
Industries we serve
How to Edit Videos on a Laptop with iMovie on Mac

Editing videos on a Mac using iMovie provides a user-friendly interface and powerful features that make video production accessible to everyone. In this section, we’ll explore the essential steps to create and edit videos efficiently using iMovie.
- Opening iMovie and Creating a New Project: Begin by launching iMovie from your Applications folder or by searching for it using Spotlight. Once opened, you’ll be greeted with the iMovie project library. Click on the “Create New” button and select “Movie” from the dropdown menu. You’ll then need to name your project; choose a name that reflects the content or theme of your video for easy organization. After naming your project, click “OK” to enter the editing interface, where you’ll have access to various editing tools and features.
- Importing Media: In iMovie, importing your video footage is a straightforward process. Click on the “Import Media” button located in the center of the workspace or use the shortcut Command + I. This action opens a window for you to browse your computer files. Navigate to the folder containing your video clips and select the ones you want to include in your project. Once selected, click the “Import Selected” button. The imported videos will appear in the media library, ready for you to use in your timeline.
- Editing Your Video Clips: With your clips imported, you can start editing. To add a clip to your timeline, simply drag it from the media library and drop it into the timeline at the bottom of the screen. You can adjust the placement of clips by dragging them left or right. Cutting or trimming clips is also manageable; select the clip in the timeline you wish to edit, right-click, and choose either “Split Clip” to cut it into two parts or drag the edges of the clip to trim its duration. Additionally, you can add titles, transitions, and effects using the corresponding buttons located above the preview window.
- Exporting and Sharing Your Finished Video: Once you’ve completed your edits and are satisfied with the final product, it’s time to export your video. Click on the “File” menu in the top left corner of your screen, hover over “Share,” and select “File” for local storage or other options such as YouTube or email. A new window will appear, allowing you to select the resolution, quality, and compression settings for your video. After adjusting these settings to your preference, click “Next,” choose a location to save your file, and then hit the “Save” button. Your video will begin exporting, and once completed, you can share it with friends and family or upload it to your chosen platform.
How to Edit Videos on Laptop for Free using Adobe Express

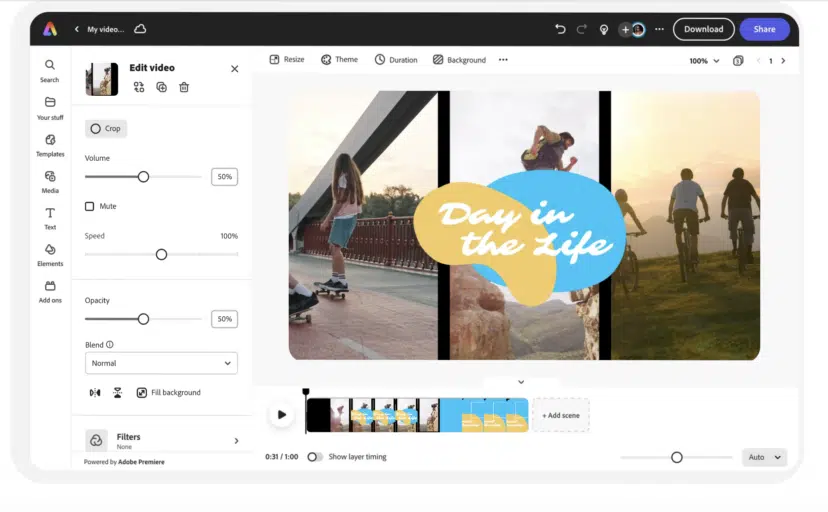
- Sign in to Adobe Express: Begin by visiting the Adobe Express website and signing in with your Adobe ID or creating a new account if you don’t have one.
- Create a New Project: Once logged in, select the “Create New” button and choose “Video” from the list of options to start your video editing project.
- Upload Your Media: Click on “Upload” to import video clips, images, or audio files from your device. You can also choose to record directly if needed.
- Edit Your Video: Use the tools provided to trim, split, or rearrange clips in your timeline. You can also apply filters, add text, or overlay music for more engaging content.
- Preview Your Project: Regularly use the preview feature to see how your edits come together, ensuring your final product flows smoothly.
- Download or Share: Once satisfied, click on the “Download” button to save your video in the desired format or share it directly on social media platforms.
By following these user-friendly steps, you’ll be able to create and edit videos effortlessly using Adobe Express on your laptop.
Let’s get started with video editing on laptops
In summary, we’ve explored various tools and techniques for editing videos on laptops, particularly focusing on Adobe Express due to its accessibility and user-friendly interface. By signing in, creating projects, uploading media, and utilizing editing features like trimming, filters, and text overlays, users can effectively enhance their video content. When choosing the right video editor, consider your experience level and specific needs. Beginners may prefer simpler, intuitive platforms such as Adobe Express or other free tools that offer basic features, while more experienced users may benefit from software with advanced capabilities like iMovie or Adobe Premiere Pro. Assessing your goals, whether for casual sharing or professional projects, will guide you to the best editor for your video editing journey. Additionally, if you’re looking for professional assistance, consider partnering with a video production agency in India to elevate your projects further.

