
Last Updated on March 27, 2026
Contents
Estimated reading time: 9 minutes
How to Edit YouTube Videos: Tips and Tools for Everyone
Video editing has become a crucial skill for anyone looking to create impactful YouTube content. With millions of videos vying for viewers’ attention, the ability to produce high-quality, engaging content can make a significant difference in attracting subscribers and retaining audience interest. This guide aims to equip beginners and intermediate users with the essential tools and techniques needed to edit YouTube videos effectively and creatively. By understanding the fundamentals of video editing, aspiring creators can elevate their content, tell compelling stories, and ultimately achieve greater success on the platform.
How to Edit YouTube Videos on Different Platforms?
Editing YouTube videos can vary significantly depending on the platform you choose to work with. In this section, we’ll explore the unique features and editing capabilities offered by different platforms, helping you to make an informed decision based on your needs and expertise.
Editing YouTube Videos on a Computer/PC
When it comes to editing YouTube videos on a computer, several software options stand out due to their powerful features and user-friendly interfaces. Adobe Premiere Pro is a widely-used industry standard that offers a robust suite of tools for precise editing, collaboration, and advanced effects. Final Cut Pro is a favourite among Mac users, known for its intuitive design and seamless integration with Apple’s ecosystem, making the editing process smooth and efficient. DaVinci Resolve is notable for its exceptional colour grading capabilities and offers a free version with plenty of features, making it accessible for beginners and professionals alike.
Basic Steps to Edit a YouTube Video
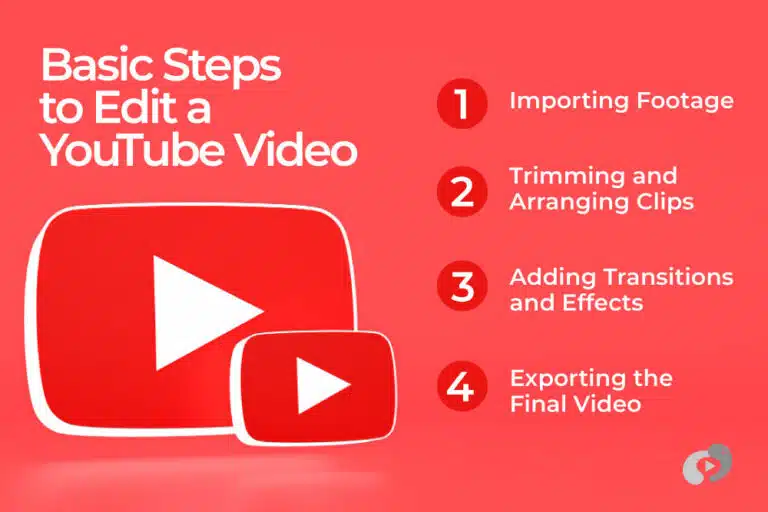
1. Importing Footage: Start by launching your chosen software and creating a new project. Import your video clips, audio files, and any other media you plan to use by dragging them into the project library or using the import option in the menu.
2. Trimming and Arranging Clips: Drag your clips onto the timeline. Use the trimming tools to cut out any unnecessary sections and arrange the clips in the desired order to tell your story effectively.
3. Adding Transitions and Effects: To enhance the visual flow, you can add transitions between clips, such as fades or wipes. Explore the effects library to apply filters, animations, or any other creative elements that complement your video style.
4. Exporting the Final Video: Once you’re satisfied with your edits, it’s time to export. Choose the appropriate export settings—ensure you select the right resolution and format for YouTube (typically MP4 with H.264 codec). Finally, save your video, and it’s ready to upload to your YouTube channel.
Industries we serve
Editing YouTube Videos on a Phone
In addition to the software mentioned previously, there are several other popular video editing applications that offer unique features tailored for both beginners and advanced users. iMovie for iOS is where many Mac users start their editing journey. It provides a user-friendly interface and essential editing tools that make video creation straightforward. KineMaster is a versatile editing app available on both Android and iOS, praised for its multi-layer editing capabilities and robust features, allowing for detailed editing on-the-go. Adobe Premiere Rush caters to content creators looking for a simplified version of Adobe Premiere Pro, offering a streamlined interface with powerful editing tools and the ability to export directly to social media platforms, including YouTube.
Basic Steps to Edit a YouTube Video on Popular Platforms
1. Importing and Organizing Clips: Launch the app and create a new project. Import your video clips, images, and audio files into the application’s media library. Most apps allow you to organise your assets into folders or collections for easier access.
2. Using Basic Editing Tools: Drag your clips onto the timeline. Use tools like cut and split to remove any unwanted parts of your footage. You can also add background music or voiceovers by importing audio files and placing them on the audio tracks below your video clips.
3. Applying Filters and Transitions: Enhance your video by applying filters that change the colour grading or overall look. Add transitions between video segments to create a smoother flow; common transitions include cross dissolves, fades, and wipes, all of which can typically be found in the app’s effects library.
4. Exporting and Uploading Directly to YouTube: Once you’re satisfied with your edits, proceed to export your video. Select appropriate settings (resolution and format) optimized for YouTube, and many applications allow you to upload directly to your channel from within the app, streamlining the process and saving time.
How to Edit Thumbnails on YouTube Videos?
Thumbnails serve as the first impression of your video, acting as a visual hook to entice potential viewers. A well-designed thumbnail can significantly improve click-through rates by capturing attention and sparking curiosity. Bright colours, engaging images, and clear text can help your video stand out among a sea of content in search results and suggested video lists. Essentially, thumbnails provide a glimpse of what your video entails, and when they are designed thoughtfully, they can communicate the video’s topic and tone effectively. This not only encourages engagement but also builds consistency with your branding, helping viewers to recognize your content more easily. As a crucial element of video marketing, investing time in creating eye-catching thumbnails can lead to higher view counts and greater audience retention.
Creating Thumbnails
When it comes to creating engaging thumbnails, a variety of tools and software are available to assist both beginners and experienced designers.
Canva is a popular choice due to its user-friendly interface and extensive library of templates, images, and fonts, allowing users to create professional-looking thumbnails with ease.
Adobe Spark offers similar capabilities, providing customizable templates and design elements that cater to various styles and aesthetics. For those seeking more advanced editing features, Adobe Photoshop is the go-to software, allowing for intricate design work and detailed adjustments.
Additionally, online tools like Snappa and Fotor provide straightforward options for thumbnail creation, making it accessible for anyone looking to enhance their video presentation.
Each of these tools offers unique features, enabling you to choose the one that best fits your design needs and preferences.
How to edit a thumbnail?
Editing a thumbnail effectively involves several key elements that can make or break viewer engagement.
Step 1: Choosing a compelling image is essential; it should not only be relevant to the video’s content but also visually striking to capture attention. Opt for high-resolution images that resonate with your target audience.
Step 2: Adding text and graphics is another important aspect. Keep the text brief and impactful, ideally using bold fonts that contrast well with the background, ensuring it stands out. Supplementary graphics or icons can enhance the visual narrative without overwhelming the design.
Step 3: Finally, ensuring the thumbnail is clear and readable even at small sizes is crucial since many users browse content on mobile devices. Test how your thumbnail appears at various sizes; if it looks cluttered or the text is hard to read, revisit your design. A well-executed thumbnail can significantly boost your video’s click-through rate and overall success.
How to Learn Video Editing for YouTube?
Learning video editing for YouTube is an essential skill for content creators aiming to engage and grow their audience. Whether you’re a beginner or looking to refine your skills, understanding the fundamentals of video editing can greatly enhance the quality of your videos.
Online Tutorials and Courses
There are numerous online platforms offering tutorials and courses specifically tailored for video editing on YouTube. Websites like Udemy, Skillshare, and Coursera provide comprehensive lessons that cover software usage, editing techniques, and content creation strategies. These resources empower aspiring creators to enhance their skills and produce high-quality videos.
Practice and Experimentation
To truly master video editing, practice is essential. Experiment with different editing styles, transitions, and effects to develop your unique voice. Regularly challenge yourself with new projects, allowing you to apply what you’ve learned and discover new techniques. The more you edit, the more confident and skilled you’ll become.
Joining Video Editing Community & Forums
Engaging with online communities and forums can significantly enhance your learning experience. Platforms like Reddit, Facebook groups, and dedicated forums provide spaces for sharing work, receiving feedback, and collaborating with others. Connecting with fellow editors fosters motivation and creates opportunities to learn from diverse perspectives and experiences.
How to Edit YouTube Videos for Free?
Editing YouTube videos doesn’t have to be expensive, as there are numerous free tools available that can help you create professional-quality content. In this section, we’ll explore some of the best free software options and resources to get you started on your video editing journey.
Free Video Editing Software
There are several free video editing software options available that cater to different levels of expertise. Popular choices include HitFilm Express, DaVinci Resolve, and Lightworks. These tools offer a robust set of features, enabling users to edit videos professionally without incurring any costs, making them ideal for beginners.
Using YouTube’s Built-in Editor
Using YouTube’s built-in editor is a straightforward way to enhance your videos without additional software. It allows basic edits such as trimming clips, adding music, and applying filters. Accessible directly from the YouTube studio, this tool is perfect for quick adjustments and for those just starting out with video editing.
What are some Video Editing Tips for Beginners?
When starting your video editing journey, implementing effective techniques can make all the difference in enhancing your projects. Below are some essential tips tailored specifically for beginners to help streamline the editing process and improve overall video quality.
- Understanding Storytelling: Craft a narrative that resonates with your audience. Begin with a strong introduction, develop your ideas logically, and conclude effectively to retain viewer interest.
- Creating Hooks: Capture attention within the first few seconds. Use compelling visuals or intriguing questions to entice your viewers to keep watching.
- Engagement Techniques: Incorporate interactive elements such as questions or call-to-action prompts to encourage viewer interaction, fostering a stronger connection.
- Using Transitions and Effects: Employ transitions thoughtfully to enhance the flow between scenes; however, avoid overusing effects that can distract from the content.
- Adding and Syncing Background Music: Select appropriate music that complements your video’s mood. Ensure that the audio levels are balanced, and sync music with key moments for maximum impact.
- Avoiding Over-Editing: Resist the urge to constantly cut or add elements to your video. Sometimes, simplicity and clarity are more effective; strive for a natural flow rather than a complex presentation.
Elevate Your YouTube Channel with Expert Editing
Mastering video editing across various platforms is crucial for content creators in India seeking to enhance their YouTube channels. Creating standout thumbnails is equally important as they serve as the first impression of your video, attracting viewers. Learning resources, such as tutorials and online courses, can provide valuable insights and techniques to improve your editing skills. Additionally, utilizing free editing tools can help beginners experiment without financial constraints, allowing for creativity and innovation. By focusing on these key aspects and considering professional video production services in India, you can elevate your video quality and ultimately increase viewer engagement and channel growth.

