Last Updated on March 5, 2026
Contents
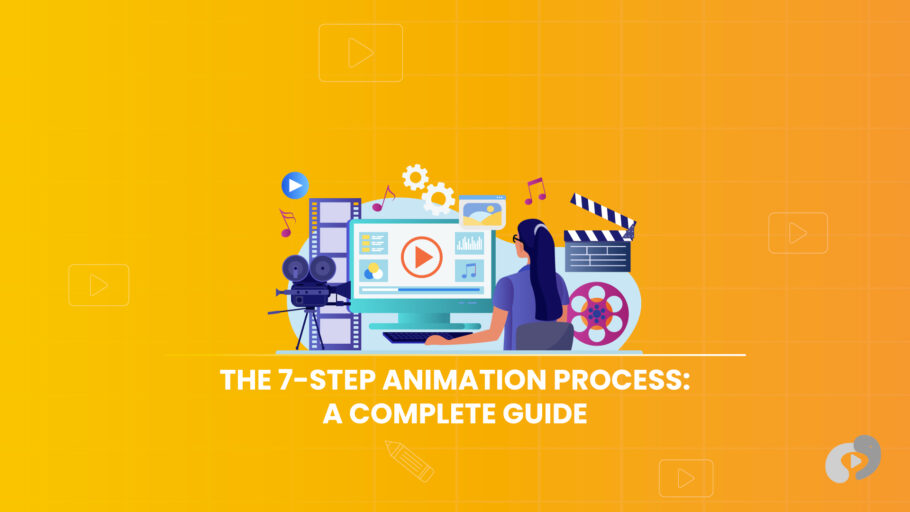
2D Animation Step by Step: A Complete Guide
Creating 2D animation is a rewarding process that transforms static images into moving, expressive scenes. From cartoons to educational videos, 2D animation offers endless possibilities for storytelling. In this comprehensive guide, we’ll explore the 7-step animation process that can help you bring your ideas to life—whether you’re a beginner or an experienced animator. Master the fundamentals of animation with this step-by-step guide. Also, explore some of the best animation websites for additional learning resources.
What is 2D Animation?
2D animation is the process of creating movement in a two-dimensional space. It involves animating characters, backgrounds, and objects in a flat plane. Unlike 3D animation, which adds depth and perspective, 2D animation focuses on width and height. The movement is created frame by frame, where each frame represents a slight change in position or shape, resulting in a continuous sequence when played together.
2D animation is widely used in TV shows, films, video games, and online content. It can be created using traditional hand-drawn techniques or with the help of digital tools. The flexibility of 2D animation makes it a favorite among artists who want to bring their illustrations to life.
Discover the stages of an animation pipeline in our detailed breakdown of Animation Step by Step.
Essential Tools for 2D Animation
To create high-quality animations, it’s important to have the right tools. This includes both software for animating and the hardware that supports it. The tools you choose will depend on your specific needs and level of expertise.
Overview of Software Tools
There are several animation software programs that cater to different skill levels. Here are a few of the most popular:
- Adobe Animate: Adobe Animate is a professional-level tool designed for creating vector-based animations. It offers a wide range of drawing and animation tools, including a robust timeline for frame-by-frame animation, symbol-based animation, and motion tweens. It’s versatile and great for creating interactive web content, cartoons, and animations for games.
- Toon Boom Harmony: Toon Boom Harmony is the industry standard for TV and film animation. It’s known for its advanced features such as character rigging, which allows animators to create reusable puppet rigs with bone structures for fluid motion. Harmony also supports both traditional hand-drawn and cutout animation styles.
- Krita: Krita is a free and open-source tool that’s perfect for artists who want to experiment with digital painting and 2D animation. While it’s not as feature-rich as some paid programs, it offers a simple interface and basic animation tools that are ideal for beginners.
- OpenToonz: OpenToonz is another free option that’s widely used by professionals in the animation industry. It offers a powerful set of tools for 2D animation, including frame-by-frame drawing, tweening, and motion paths. OpenToonz is a great choice for animators on a budget who still want access to high-quality tools.
Hardware Requirements
While software is important, having the right hardware is equally crucial to a smooth animation process:
- Graphics Tablet: A graphics tablet is essential for animators, allowing you to draw directly onto the screen with a stylus. This is especially useful for frame-by-frame animation. Popular brands include Wacom, Huion, and XP-Pen, which offer different sizes and levels of pressure sensitivity.
- Computer Specs: 2D animation, particularly when working with high-resolution files and complex effects, can be demanding on your computer. You’ll need a machine with at least 8GB of RAM, a fast processor (such as Intel Core i5 or higher), and plenty of storage space. A good GPU can also help with rendering times, though it’s less critical than in 3D animation.
Step-by-Step Guide to 2D Animation
Choosing the right animation styles at each step of the process ensures a cohesive and engaging final product. The process of creating a 2D animation can be broken down into seven key steps, each building on the last. Here’s a detailed look at each stage:
Step 1: Concept and Storyboarding
The first step in any animation project is developing a concept and creating a storyboard.
- Importance of a Clear Concept: A strong concept forms the foundation of your animation. Before you start animating, it’s essential to have a clear idea of the story or message you want to convey. This will guide your character design, movements, and overall pacing. Whether it’s a short film, an explainer video, or an animation for social media, the concept should be solid before any artwork is created.
- How to Create a Storyboard: Storyboarding helps you visualize the flow of your animation. One of the most crucial steps is brainstorming storyboard ideas that align with the narrative and creative goals. A storyboard is essentially a series of rough sketches that outline the key scenes in your animation. Each frame should represent a major action or change in the scene. It doesn’t have to be highly detailed—just enough to map out the sequence of events.
Step 2: Designing Characters and Backgrounds
Once the concept and storyboard are finalized, it’s time to design your characters and backgrounds. This is where you bring your vision to life visually.
- Character Design: Designing characters involves deciding how they look and move. Think about the personality of each character—are they lively and animated, or slow and deliberate? Their personality should be reflected in their physical traits, such as facial expressions, posture, and clothing. You’ll also need to consider how each character will move, especially if they’ll be performing specific actions like running, jumping, or talking.
- Background Design: The background sets the stage for your animation. Whether it’s a simple backdrop or a detailed environment, the background helps establish the mood and setting of the scene. Think about the perspective, colors, and level of detail needed to complement the action without overpowering it.
Step 3: Setting Up Keyframes
Keyframes are the most important moments in your animation. They define the start and end points of any major movement. For example, if a character is throwing a ball, the keyframes would show the character’s hand holding the ball, the moment they release it, and the follow-through after the throw.
- Why Keyframes Matter: Keyframes are the framework of your animation. They map out the most important actions, giving structure to the sequence. This helps maintain consistency in movement and timing throughout the animation.
- Setting Up Keyframes: Using your animation software, place keyframes at the beginning and end of each major action. Be sure to exaggerate movements in keyframes for more expressive and dynamic animations.
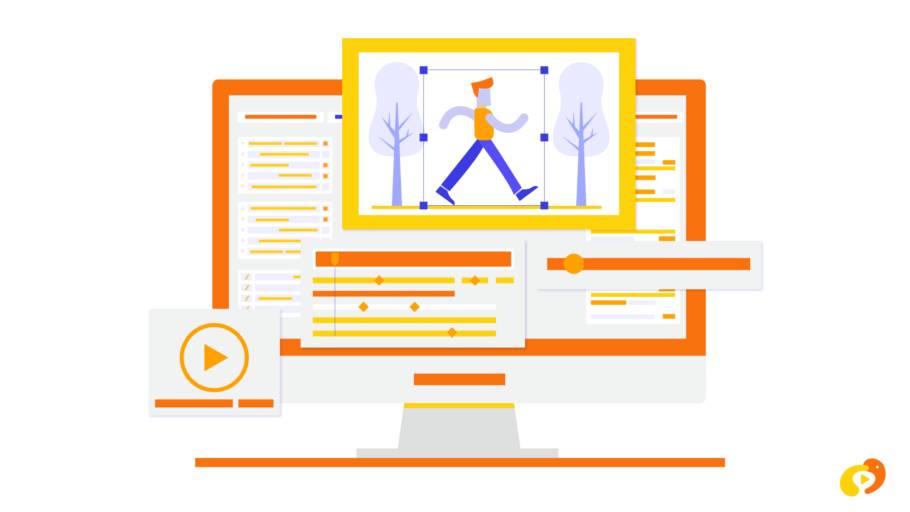
Step 4: Tweening and In-between Frames
Tweening, or creating the in-between frames, is where the magic of animation happens. Tweening fills in the gaps between your keyframes, creating smooth transitions.
- Manual Tweening: While software can help automate the process, many animators still prefer to create in-betweens manually for more detailed and controlled results. This involves drawing each frame by hand, adjusting the object or character slightly in each frame to make the movement appear fluid.
- Motion Tweening: Modern animation software like Adobe Animate allows for motion tweening, where you can set the starting and ending positions of an object, and the software will automatically generate the in-between frames. This is especially useful for simple movements like moving an object across the screen.
Step 5: Adding Motion and Effects
With the basic animation sequence in place, the next step is to add additional motion and effects to enhance the overall look and feel of your animation.
- Adding Motion: Animating secondary movements, such as hair swaying, clothes fluttering, or background elements shifting, adds depth to your animation. These details help make the world feel more alive.
- Adding Special Effects: Effects such as motion blur, lighting changes, and shadows can add realism and drama to your animation. Depending on the software you’re using, these effects can be applied manually or through built-in tools.
Step 6: Syncing Audio and Dialogue
Sound is a critical element in animation. Whether it’s background music, sound effects, or character dialogue, audio helps set the tone and adds dimension to your work.
- Lip Syncing: If your animation includes dialogue, syncing the character’s mouth movements to the audio is essential. This involves creating different mouth shapes for each sound or syllable and matching them to the spoken words. Software like Toon Boom Harmony makes lip-syncing easier by allowing you to automate the process based on audio files.
- Adding Sound Effects and Music: Carefully select sound effects and background music that complement the visuals. Sounds should match the actions on screen, while music can enhance the mood and pacing of the animation.
Step 7: Final Rendering and Exporting
Once all the animation and audio elements are complete, it’s time to render and export your final animation.
- Final Rendering: Rendering is the process of combining all your animation frames, audio, and effects into a finished video. Depending on the complexity of your animation, rendering can take time, especially if you’re working with high-resolution files or detailed effects.
- Exporting: After rendering, you’ll need to export your animation in a format suitable for your intended platform. Whether it’s for web, television, or social media, make sure to choose the right resolution, file type (MP4, MOV, etc.), and frame rate for optimal quality.
Tips to Improve Your 2D Animation Workflow
While animating is a time-consuming process, there are ways to improve efficiency and make the workflow smoother.
Time Management Techniques
Breaking down your animation project into smaller tasks and setting deadlines for each step can help you stay on track. Prioritize tasks like character design or keyframing that are more time-consuming. Allocate enough time for revisions and adjustments along the way.
Using Animation Shortcuts
You don’t need to animate everything from scratch. Use pre-made templates, rigs, and reusable assets whenever possible. Character rigs, for example, allow you to create a bone structure for a character, making it easier to animate movements like walking or running without needing to redraw each frame. Using library assets like backgrounds or props can also save time.
Conclusion
2D animation is a versatile and creative medium that allows you to tell engaging stories through movement and art. By following this 7-step animation process, you can take your ideas from concept to completion in a structured way. Whether you’re working on a short film, explainer video, or a personal project, mastering these steps will help you create polished and professional animations.

